Friday, February 14, 2014

A Weekend With Ann Scherm-Baldwin

So ~ this is what I got for Christmas this year from my DIL
I know - you're jealous - and you should be, it was amazing!

We had a great view to wake up to every morning:


Then we headed to Ann's house to start our lampworking adventure! The garage has been converted into Ann's Laboratory - it's crammed full of glass making STUFF!


Ann is lots of fun - she's a bit of a hoarder, and besides glass she quilts, beads and is a Minecraft junkie. I could have spent days looking at all her collected beads and not have seen all of them.  In addition to the garage she also has a craft room that is seriously jam packed with awesome sparkly goodness - my eyes were so full!

     It's great to have a teacher all to yourself. Ann's been doing classes for years and has mountains of patience, which in my case is extremely important because I have ADH-Oh Sparkly!! and have a hard time staying focused. I took a lampworking class at the bead show in Philly about a year ago. Even though we had a really great teacher, it's hard to come away with a lot of hardcore knowledge. There was a large group of us, all the equipment was already set up and you're always aware of the time constraints.
     The first part of the class is all about the back story to making beads - safety, equipment, glass, setting up a studio - It was fabulous because lampworking can be a bit scary. You work with extremely hot stuff, kilns, flames, molten glass ~ stuff you can seriously hurt yourself using! I felt like I asked a million questions and interrupted Ann's lecture thousands of times, but she never lost patience or scolded - such a sweet lady!
     Then we moved on to the fun (but still scary) part - actual bead making! The first thing I learned is that you can't do this right the first time or the tenth time or for a long time. You have to get over the scary part, you have to develop the muscle memory to make beads which only comes with practice, practice, practice!


The top picture is Jamie laying the glass on the mandrel to begin building a bead. You can see the bead taking shape in the bottom image.


No, they aren't perfect! 
  
     The ones in the top of the picture are the result of Ann trying to teach a decorating or shaping technique. The beads on the bottom are the ones made the second day when I was mostly just trying to get the hang of making them round, balanced and consistently the same size.

      I had such a fun time this whole trip - being at the beach was a nice break from the miserable winter. We had dinner in some great restaurants and relaxed for a couple days while learning about this awesome craft. Now I'll be able to survive the rest of the winter while plotting how to fit a studio in my house!

Saturday, November 9, 2013

Making a Princess Feel the Part!

My niece is getting married next summer to a wonderful guy. They've had a tough couple of months and have complicated lives so the wedding plans keep getting put on hold. But - finally - there is a date set for all the bridal party to get together to go dress and flower shopping. I thought it would be nice to start the day off with a little treat so I made bracelets for the bride-to-be and the merry maids in her wedding colors of pink & navy -
I just wanted something simple, so I went with the classic round ceramic beads. I love the brides sparkly crown toggle and the merry maids smaller crown toggles. The charms are a nod to the location which is on the beach in Maryland.

Wednesday, October 23, 2013

Jumprings - DIY


There is something satisfying about making your own components, whether its the clasp, the beads or the connectors. If you've never tried making your own jumprings you're in for a pleasant surprise - it's not that hard and there are an endless number of ways to get just what  you need.

There are a ton of gizmo's out there to make your life easier.


These little mandrel sets are probably the easiest - its pretty self explanatory, wrap the wire around the mandrel, slide it off cut the rings apart. The problem with this is what kind of pliers do you use? You want a really flat cut so the ring will close as seamlessly as possible.

The obvious choice is the Double Flush Cutter. There are problems with pliers - if you need a lot of rings for a large project this is going to take forever! The shape of the head on the double flush cutters make it hard to cut smaller rings, but if you're doing say, 9mm or larger and you only  need a few at a time these are great.


Me - I like BULK - I don't want to have to stop in the middle of a project to wrap and cut jumprings.

So, I went the semi-pro route -
I have a complete cutting system - the Pepe coiler is awesome.

It can make any size jumpring you can dream up simply by inserting the correct size mandrel in the handle and winding right off the wire spool. In a couple of seconds you have a wire coil about 4" long.
The second step is as easy as the first. I have what my son calls the "Uber Dremel" - its a Flex Shaft cutting and grinding tool. The handle has a very thin (.008), VERY sharp blade, you operate with a foot pedal.

The coil goes under the metal plate, tighten the nuts to hold it snug, place the shaft flat on the plate, press the pedal and slide forward at a steady pull. It only takes a couple of seconds to cut the coil into lovely, perfect, flush closing jumprings!

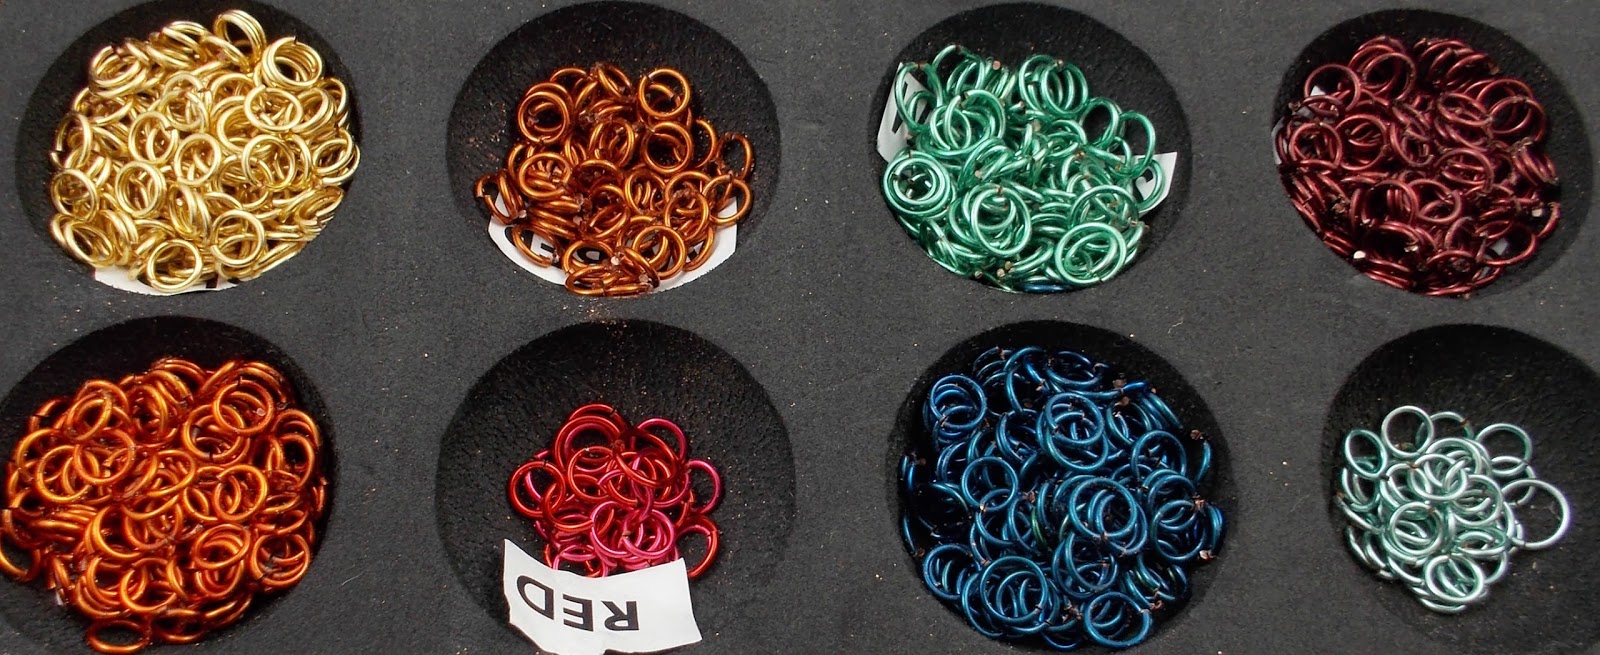
Before you know it, you have a zillion rings in a rainbow of colors!
You can purchase jumprings in a fair number of colors at better bead stores but it's usually near impossible to get a variety of gauges or anything more then two or three sizes. What are you supposed to do when you want to have a hook that's the same color as the jumprings or maybe you need a 20mm jumpring? I love having the option of sizes, shapes and colors.

You don't need anything expensive - you can use anything for a mandrel, a pen or a knitting needle are good choices. Get creative! Get exactly what you want - don't settle for what you can find - and as always.... have fun!

Tuesday, October 22, 2013

Retro Remake

My Aunt came to visit in September. She loves antiques, so while she was here I took her to a huge (5 barn sized buildings!!) antique place in Fayetteville, PA. I didn't really expect to find anything - it's not really my decorating style. I thought it would be a nice day for her...

Was I ever wrong?? One of the vendors in the first building had cases and cases of vintage jewelry! It was awesome! I bought several brooches and pins for a bouquet I'm playing around with. I also got a couple of long necklaces that were made out of lucite. You know, that stuff your mom wore in the 50's? The beads were that typical salmon kind of pink that was so popular back then.

Anyway - I stupidly did not take a photo of the necklaces before I cut them apart - sorry!! But I did want to share with you a couple of pieces that I've put together.

A-D-O-R-A-B-L-E!!

This one has the white sparkly lucite rounds and the pink inverted barrel shapes that turned out to be perfect with my favorite component - rubber O's!!
The hook is my own creation using 18g black wire, a bead cap and a bead.
The necklace uses more of the pink barrels, which I think paired perfectly with Donna Millards hand made vintage caps.The ribbed turquoise rounds were a great spacer and the color has that vintage feel.
The etched lampwork lozenges came from IMakeBeads on Etsy. The hook is, of course, my creation. I used sterling 18g wire and one of the ribbed turquoise rounds as an accent. I love the fun, light hearted feeling of this piece.

So - get yourself to an antique mall! They're loaded with fun vintage stuff at pretty good prices.

I even managed to find myself an awesome new desk chair!!

Wednesday, September 11, 2013

Create Space

For years I've dreamed of having a big, bright space all to myself. Space that I could use to make stuff. Where I could start a project, and if I didn't finish it, I could leave it set up and come back to it later. Instead, I've worked at the kitchen table, in the laundry room, at the dining room table - having to set up, start, run out of time, pack it all up, store it out of the way - wasting all my 'create time' getting ready or cleaning up!! GAK!

When we bought our new house, I thought that maybe I'd be able to convert some space in my garage. As it turns out, its too hot or too cold or too stuffed with stuff that we're storing for the kids (who no longer live at home!) ~ sigh ~

BING! The light goes on (finally) - we have a H-U-G-E unfinished basement. So, thanks to Angie's List, we found a local handyman who did the electrical and the framing. We hung the drywall, moulding, trim. Lowe's put down some fabulous carpet and viola! (mostly) - I have this awesome space to set up for CREATING!! It's very much a work in progress - my brother, who is a pretty awesome carpenter is making shelves that will hide my hot water tank and the HVAC. I still need lights and tons of other stuff but I'm getting there!!
I love that I have the doors out to the yard. Lots of natural light, and I hope to have a little patio and garden space out there! (future project!)
 
I love these base cabinets. I get them at Lowe's. So cheap! They make the perfect work station - slap a section of counter top on them - bang! done!
The sewing corner - these cubes are going to do double duty - fabric storage and I'm planning to top them with a large counter piece for cutting.
Now for the fun part! Gathering all the stuff from all the closets and hidey holes all over the house and getting it organized!
A place to bead - probably need some more shelving or cabinets above - but its a good start!
Fabric storage and cutting table - I like that its tall enough to work around standing up without killing my back!
A nice, big table with a drawer for sewing - just have to figure out the ironing board situation.
A sturdy new home for my favorite tool! the Flexshaft and Pepe coiler - awesome power!!
Made this nifty cork board for ideas out of a frame I found on clearance at Hobby Lobby for $10!

There you have it - the start of something big! Still needs a bit of work, a bit of polish - a few more storage ideas and definitely paint - who could live with all that white???  Anyone who has some awesome storage ideas - feel free to share!!

Thursday, September 5, 2013

Oh, the Shame!!

I'm always happy to show people my creations. I know that my work isn't for everyone, but I'm always pleased with what I put in my shop. That's not to say that I'm always pleased with everything I do - case in point, my first attempt at  making lampwork beads.

I've wanted to learn this amazing craft for several years and finally had the opportunity to take a class from an incredible artist - Bronwen Heilman - at Bead Fest. Bronwen is a great teacher, patient and fun to work with.

What I learned about working with glass is that it's much like patting your head and rubbing your tummy! There are a lot of things to be paying attention to at the same time. I think that you have to do a hundred of the same type of bead to develop the muscle memory needed for this craft. In my case, I might need to make 1000 of the same bead!!


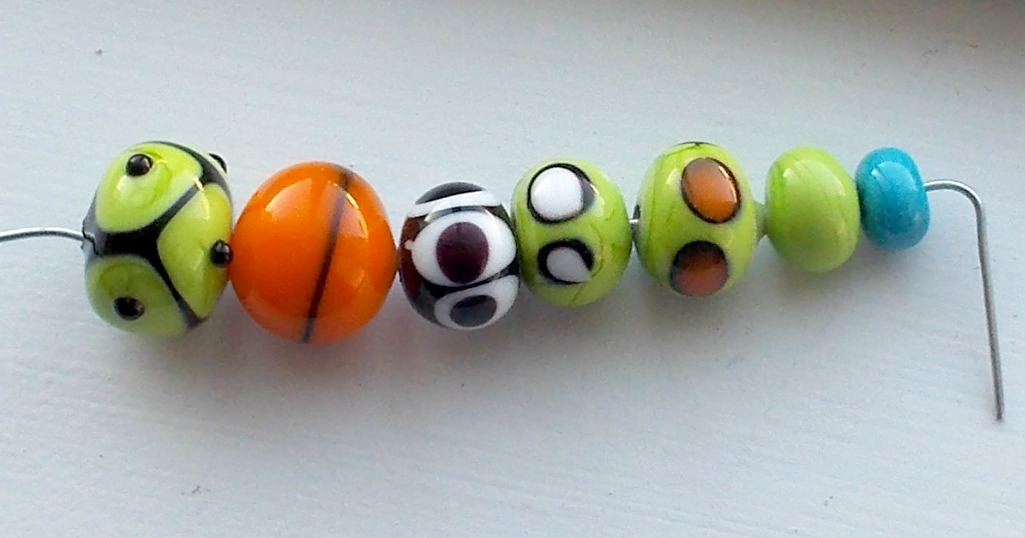
In the eight hours I spent in class, I managed to make about two dozen beads. This is all that survived a night in the kiln. Apparently, you have to get them into the kiln while they are smokin' hot! I didn't move fast enough - sadly! The little blue one on the right was my very first bead - its about 9mm.
As you can see, I had a little trouble keeping things balanced and even! I also had a problem keeping the beads level on the mandrel, which is why they look like gourds!!
The green and black with the little dots was my attempt at learning to use 'stringers' - a little wonky but not a complete failure! Can't even begin to tell you what happened to the weird orange one!
Will I continue to try to make beads? YES! This was such a challenge, but so much fun. I love to learn new things, to expand my knowledge base is always a good thing - I might not become an expert, but as I progress I'll be sure to share my attempts with you!

Thursday, August 29, 2013

Cool Tool!

One of my favorite things about going to bead shows is getting to talk to so many experts. I was chatting with one of the sales people at the Jewelry Tools booth where I got an awesome pair of Wubbers pliers when I saw this...
    
     It's called the Double 3rd Hand. It's my new favorite tool. Everything on it is adjusts and swivels in every possible direction and is removable. The clips are strong enough to hold just about anything I need to hold onto and the magnifier is perfect for really close up work on tiny pieces. Here's the best part - it was only $5.95!!

What's your favorite handy gadget in the playroom?
Pin It button on image hover