Friday, October 2, 2015

Yea, I Fixed That!

I almost never buy jewelry, why should I? I usually just make my own. But once in awhile I see something that catches my eye. We were on vacation earlier this year and my daughter and I were shopping one afternoon. We found these nifty little bracelets called 'Gingersnaps' - they have a little piece in them that you can 'snap' different charms into. Aww, now who doesn't want a sparkly turtle? So, I bought one, made a nice, inexpensive souvenir from our trip.


I wore it one day while we were still on vacation, then packed it up and brought it home. When I opened my travel case - it was broken. Dang it! I hate when that happens. But, serves me right for buying 'cheap'. So I fiddled around with it a little bit, decided that I could probably glue it and it might hold up for awhile. OR - I could make something else out of it, something better, something sparkly and unique!


So, I took the whole thing apart, kept what I thought might be useful for other projects - waste not want not! I dug around in my stash of beads and such until I came up with a color scheme and some beads that I thought worked well together. I ended up with this...


A little more my style... I love the colors and I prefer toggle clasps to the lobster claw that was on the original piece. I also really like that it looks like a watch but it isn't. Win - Win situation for me, I still have a souvenir from my vacation, I can still get more of the little snap on charms if I want something different which is a pretty cool feature and I ended up with a one-of-a-kind piece that I love!


Moral of the story, don't throw away old or broken jewelry. The components can usually be worked into something new that you can continue to love and wear!

Thursday, September 17, 2015

Bears and Bears and Whale Tails? Oh My!

Something I've learned about myself is that every once in awhile it's important for me to kick start my creativity. If I work too long at one particular type of craft I find myself losing steam and it becomes harder and harder for me to come up with something that feels fresh. As soon as that happens I know I need to be poked in that part of my brain that comes up with new ideas.

Kickstarting isn't always complicated, sometimes it's as simple as buying a magazine and taking a look at what new products or trends are coming down the pike. Seeing another artists methods can trigger an idea, attending trade shows is an almost overwhelming stimulus to new ideas, but one of my favorite kickstarts is always classes or workshops.


A couple of weeks ago I went to Pennsylvania to visit Jean Van Brederode in her studio - Charmed I'm Sure. Jean was running a workshop on kiln enameling with liquid and powdered enamels. The finished project was this bracelet of polar bears. Once I saw the picture, I knew that I'd found my kickstarter!


Jean is the perfect person for visiting if you need a little inspiration boost. Her studio is jammed with the coolest tools, supplies and finished projects - you don't even need to do anything but sit there, you can't help but be motivated to create something. And Jean is a generous and patient instructor.

So, we watched a short video presentation about the project we would be working on, Jean gave everyone a printed instruction sheet, tool kit and all the supplies we needed for the bear project.


 We spent the next six hours learning about hydraulic presses, pancake dyes, kilns, enameling with liquids and powders and a host of other things related and not related to the project we were working on!


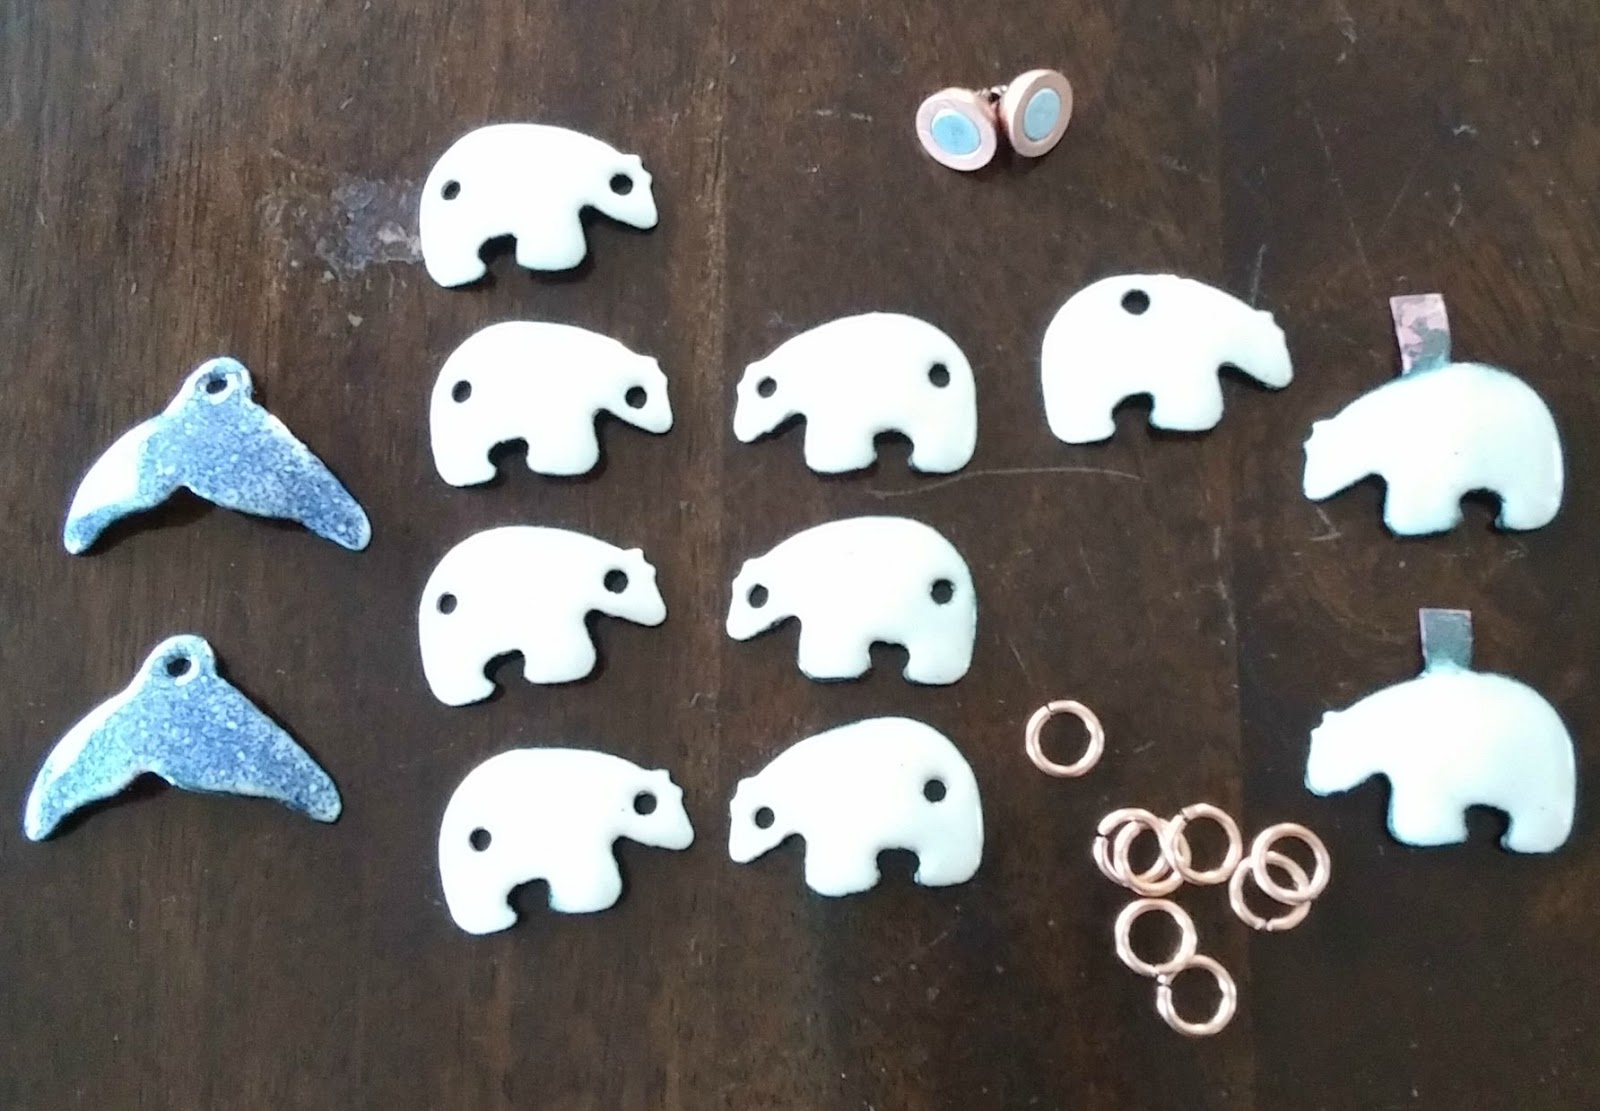
The process of creating the little bears was enough to get me percolating with ideas on what to make. I  knew that I wouldn't be happy making just one piece so I made sure to put holes in the sides and tops as well as making bears that faced in both directions. I also made a couple of bears with a tab on top thinking that they would make really cute necklaces. While I was at it, I made two whale tails just because Jean said I could!


At the end of the day I had a little pile that looked like this:


I gleefully drove home with  my little stash envisioning all the adorable things, rustic things, sparkly things that could be made with these delightful little copper bears!

The first thing I made was this bracelet - I love that it feels chilly with the cold and snow but sparkly at the same time - like the sun on snow. Glass is almost always my medium of preference so of course I had to have some white and clear lampwork beads in there and silver is the perfect shiny accent.

After that there was no stopping! I made several more pieces...


Two more bracelets and the necklace using one of the tabbed bears. AND.... I haven't even used the whales yet!

This was the perfect day for me - I seriously kick started my creative brain process, I learned something new, had a great day with a fun bunch of other creative people and made new friends - oh, and for a bonus, had a delicious lunch!

So the next time you're sitting in your studio pondering your pile of stash and drawing a blank - check out the internet - there are classes and workshops everywhere! If you live near Mechanicsburg, PA - go see Jean - she'll inspire you!

Monday, August 31, 2015

DIY - Eyeglasses With Class!

Eyeglass chains are one of my favorite things to make, they're such a personal statement of your style. They're also the perfect combination of form and function - who doesn't want to look great while doing something practical? An eyeglass chain keeps your readers or sunglasses close at hand, saves you time you would have wasted looking for them and looks great whether you have them hanging around your neck or perched on your nose!

These chains are also a pretty easy do-it-yourself project.

So, if you're feeling a little crafty - give it a try!


First thing you need to do is think about the colors - maybe you're a cool blue or a spicy orange - whatever it is you'll need to gather a few items to get started:


You'll need an 18" length of chain - I like to use enameled chain because it's comfortable against your neck, really durable, colorfast and it comes in about a zillion colors.

You'll also need the components - an important thing to keep in mind is that you'll need two of each bead or component because you'll want to make each end of the chain symmetrical.

Finally, you'll need lots of jumprings and two rubber ends. I use 18gauge colored copper jumprings because they're sturdy and add a little extra pizzazz! The ends are made by tightly wrapping a set of rubber O rings with wire.


Now to the fun part!


Start by putting together the components. You can use simple wrapped loops on either end of a bead or two, just remember to make two of each component. You can lay them out along a ruler making sure that you have 5" or 6" of components, remembering that your O ring connectors will take up about an inch and also allowing for your jumpring connectors.


Now to assemble your components!


Think about how the piece will look hanging next to your face as well as hanging around your neck. Your components shouldn't be overly large or heavy. The finished piece shouldn't weigh more than two or three ounces. If you have larger pieces, add them first - that way they'll end up closest to the chain and furthest from your face.


What!? Yes, it's just that simple!


Put on your happy face and get out there! There are fun things to see and read!!

Tuesday, June 23, 2015

Blooms for June!

We had a wedding to go to this month - of course, cause it's June! So, I got my outfit together - white linen pants and an awesome seafoam green top - very pretty. But I still needed a great bracelet to pull it all together. I wanted something really colorful, fun and loaded with pizazz!


I ended up with tons of glass flowers, enameled beads and toggle and a  mountain of colorful accents from Yvonne Irvin.


Definitely feeling ready to party at a wedding!


Monday, November 10, 2014

PDF or Not?

     I've been seeing a trend in the online stores lately. In addition to the physical item there is also the option of purchasing  the electronic or video files for the step-by-step instructions so you can make the product yourself.

     My daughter-in-law is a member of a site for educators that is built on this premise. You create digital files of lesson plans or other classroom activities and make them available to other members of the site for a fee. It's called Teachers Pay Teacher and it's and enormously popular site.

     I wanted to make an apron with a retro feel for a friend as a holiday gift. I went online and found that hundreds of patterns are available to purchase. Most of them are original patterns from Butterick or McCalls etc...
     These are usually reasonably priced and a great way to find a pattern that is no longer made by the company.

     This made me curious - and I started doing searches for patterns or instructions for other items. I found patterns for a purse that I wanted to try that I couldn't find a commercial pattern for anywhere!


     This one was a free download - and from this pattern I was able to make this:


So, I continue thinking and decided that I like the idea of making step-by-step instructions for some of my most popular items and at the same time continuing to sell the physical item for people who aren't inclined to try a DIY project. This could open up an entire new market and help me combat the loss of sales on Etsy to the Chinese ready made companies that have flooded the site.

What do you think? Is this going to cost me sales? Am I going to start seeing my currently unique items flood the market? Do people really want to make everything themselves?

Much to think about before I step into the void...


Tuesday, October 21, 2014

Bow Ties ~ Charming, Sexy, Cool, Nerd Chic, Fun, In Style!

Bow ties have made a wonderful comeback! I'm so excited about this - I love a man in a bow tie.
I don't care what kind of bow tie - there's a bow tie for every man and every occasion - they are the classic, timeless men's accessory!

When someone says bow tie, this is the image that immediately comes to mind... the ultimate sexy, cool, spy guy - Sean Connery. But then almost as fast I get several other images as well....


Bill Nye!! Of course... I've never seen him without his signature bow ties - he's won awards for his ties! Nerd Chic! Love this look!


My niece just got married - this is what the groomsmen all wore - completely adorable, sexy, fun. Men in fuchsia ties! It's a striking look with the black tux - so sharp, but still fun.


Bow ties, everyone can wear one.... seriously - Good Guys, Bad Guys..... equally awesome look!


Colorful guys look great - gotta love the pocket square accessory!


Really, really smart guys can totally rock a bow tie! Even if they're having a bad hair day.....


Funny guys look great in bow ties!


I can't think of any occasions when a bow tie won't rock the house. So, if you have a guy and bow ties aren't a go to accessory in his wardrobe - you now know the perfect Christmas gift don't you????

And - you're in luck - I happen to be making the most amazing bow ties!!


So, head over to my website - www.rigglettes.com and have a look. It doesn't matter what style your guy is - a bow tie will make it better!


Thursday, October 9, 2014

Eyeglass Chains - Add Some Fun!

Like millions of other people I wear glasses. I can see far away, but I'm blind as a bat up close. So, I wear reading glasses. The frustrating part is that I put them down... I forget where I put them or I leave them in the car, at work, at my sisters GAK!! Then I need them, can't find them, buy another pair and the cycle starts all over.

I must have at least a dozen pair of readers.

I looked at eyeglass chains...
Practical, sure -- but U-G-L-Y!

And.... what the heck is this little rubber thingy on the end???

BORING!!

So, I set out to make something that I would actually wear.... something colorful, something whimsical, something FUN!!


The more I made - the more they made me smile..... such fun! Now I always know where my glasses are and this definitely doesn't look like something my great grandmother would have worn! I even figured out a way to make those little rubber ends more fun!! Now I need to do a post on how to make them!

You can see more of these on my Etsy site: www.rigglettes.com


Pin It button on image hover